If you want to do code coverage with multiple users, you might have noticed that it is not easy to attach multiple processes and different users to the vsperfcmd sampling process.
A very useful technique that has been supported in Visual Studio for a long time is merging the code coverage results.
But you should beware on how to use code coverage efficiently. You should not really use it to cover a whole application, and specially on a very large level. Mostly because of the scalability. But it might be useful on smaller projects to show the amount of working code in percentages. But for the code coverage to be efficient, you will need to write the test cases in a way, that every possible outcome is covered to get the best accuracy. Code coverage can be quite consuming. But it might be very useful for example to follow where the program goes in the code and which blocks of code it is executing and which ones not. This may help you debugging and finding the causes of bugs more quickly.
Planning
Do to the test runs efficiently with multiple users, plan wisely before starting who is going to execute which test runs.
For example:
-
User A executes test cases 1-50
-
User B executes test cases 51-100
Or you could do it using a shared document hosted on SharePoint, but editing the same SharePoint with mutiple users decreases in efficiency as you have more potentional users doing the test cases.
Sampling
Required scripts
Intrumentation
Instrumentation needs to be done to prepare the executable or DLL for doing the code coverage. Know that you only need to instrument the executable or DLL you want to do code coverage for only ONCE. So you probably want to have someone instrument these files before starting the code coverage as a team.
Save this as ‘instrumentation.bat’
call "C:Program Files (x86)Microsoft Visual Studio 11.0VCvcvarsall.bat" x86
@echo off
Echo Intrumentation Started ...
Pause
vsinstr /coverage "pathtoexecutable.exe"
echo Instrumentation Completed
pause
Profiling - Start
Save this as ‘profile_start.bat’.
You can always choose to append the current timestamp to it in addition to the currently logged in user running the script.
call "C:Program Files (x86)Microsoft Visual Studio 11.0VCvcvarsall.bat" x86
@echo off
echo Starting Profiler...
pause
vsperfcmd /start:coverage /output:"pathtoCodeCoverageAnalysis_%username%.coverage"
echo Started Profiler.
pause
Profiling Stop
Save this as ‘profile_stop.bat’
call "C:Program Files (x86)Microsoft Visual Studio 11.0VCvcvarsall.bat" x86
@echo off
echo Stopping Profiler...
Pause
IISRESET
vsperfcmd /shutdown
echo Stopped Profiler.
pause
Instructions
Preparation
Run ‘instrumentation.bat’. Make sure the path to the executable or DLL is correct
Coverage
-
Right-click ‘profile_start.bat’ and choose ‘run as administrator’.
-
Now just press any key until the command prompt closes.
-
Start the application you want to do code coverage for.
-
Now you can execute the test cases.
-
When you are done, run ‘Stop_Profiling.bat’ as administrator the same way as you did in step 1.
If you want to do your own test cases in multiple runs. You can save your code coverage file by running ‘profile_stop.bat’. But don’t forget to rename it before you run ‘profile_start.bat’ again, or you will lose your file.
Note that you will be limited to merging a maximum of 5 code coverage files! You cannot merge more than 5 code coverage files. This also means you will be limited to working with 5 people doing the code coverage without interruption.
Merging
-
Move the code coverage files of all team members to the same folder as the instrumented executable we just did code coverage for.
-
Double-click all the code coverage files in Windows Explorer to open them in Visual Studio (In my example Visual Studio 2015).
-
When all the code coverage files are open, click the merge-icon shown in the screenshot below. 
-
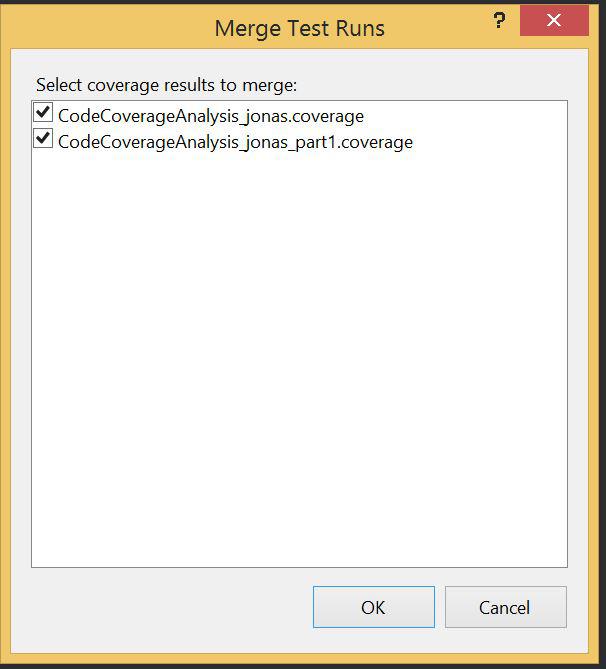
A dialog will open, prompting you to select the code coverage files you want to select. 
-
When finished, press ‘Ok’.
-
The merged results appear in the bottom window of the main screen like in the first screenshot.
-
You can export the results to a XML file using the buttons next to the merge icon if desired.