In this article, you will learn how to create a customized button with an icon for Universal Windows Apps (UWP) or Xamarin.
Icon only
Now let’s start easy by creating a button with only an icon. We will be creating a hamburger menu button that is 50 pixels wide and 50 pixels in height. You can choose to use an image, which doesn’t scale very well usually, or you can use a font.
The font we will be using is ‘Segoe MDL2 Assets‘, you can view the available icons for this font on this page. The hamburger menu button can be found by searching for the name ‘GlobalNavButton‘, but feel free to use any icon you like.
Make sure to set the ‘FontFamily‘ property to the name of this font, ‘Segoe MDL2 Assets’. Then in the ‘Content‘ property, enter the code for the icon as shown below.
<Button FontFamily="Segoe MDL2 Assets" Content="" Width="50" Height="50" />
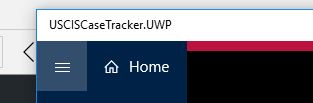
Now if you did it correctly. The result should look like the hamburger button on the left:
Icon and text
Here we will be creating the home button as shown in the picture above. To achieve this, we will have to modify the content template of the button. This way, we can embed 2 TextBlock objects in the button.
Use the layout of your preference inside the button to get the desired results. In my case, a StackPanel was sufficient. Inside the layout, we embed two TextBlock controls. The first one will be used to display the icon, while the second one will be used to display text.
Tip: Use the ‘VerticalAlignment‘ property on both TextBlock controls to get both align better with each other vertically.
<Button>
<StackPanel>
<TextBlock Grid.Column="0" FontFamily="Segoe MDL2 Assets" Text="" VerticalAlignment="Center"/>
<TextBlock Grid.Column="1" Text="Home" Margin="10,0,0,0" VerticalAlignment="Center" />
</StackPanel>
</Button>If everything went well, you should now see a similar button as shown in the picture above.