This tutorial was written with Microsoft SharePoint Online in mind. If you’re using on-premises, things may not work out as expected.
There are several other ways you can go about this, for example using client id and client secret or a certificate. We will use a service account in our example.
Requesting our service account
In our case, we wanted to expose certain document libraries to the public. We will not require users to authenticate with our API. I went with a service account because it was straight forward and convenient coming from CSOM which only seems to work with .NET Framework at this time and not .NET Core.
- Visit the ‘Microsoft Office 365 Admin Center‘.
- Create a new user, and save the credentials. Disable any 2FA authentication if enabled. At the first sign in, sometimes you may have to link an e-mail or telephone number for a back-up.
- Assign the required license.
- Assign ‘User’ role, or more if necessary.
Now the user is setup, we will create our enterprise application.
- In the menu, open ‘Azure AD‘ or ‘Azure Active Directory’, this will bring you to the ‘Azure Active Directory admin center‘.
- You will see ‘Enterprise Applications‘ in the menu, open it and proceed to create a new application.
- You’re now asked to select the appropriate application type, we will use ‘application you’re developing‘ for our demo. Our demo will be a standalone ASP.NET Core API or Azure Function.
- Now click ‘Ok, take me to App Registrations to register my new application.‘ to proceed to ‘App Registrations‘.
- Click ‘New Registration‘ at the top.
- Give it a meaningful name.
- To keep our sanity, we will only use users in our active directory so for ‘Supported Account Types‘ we choose ‘Accounts in this organizational directory only (Single tenant)‘.
- Click ‘Register’.
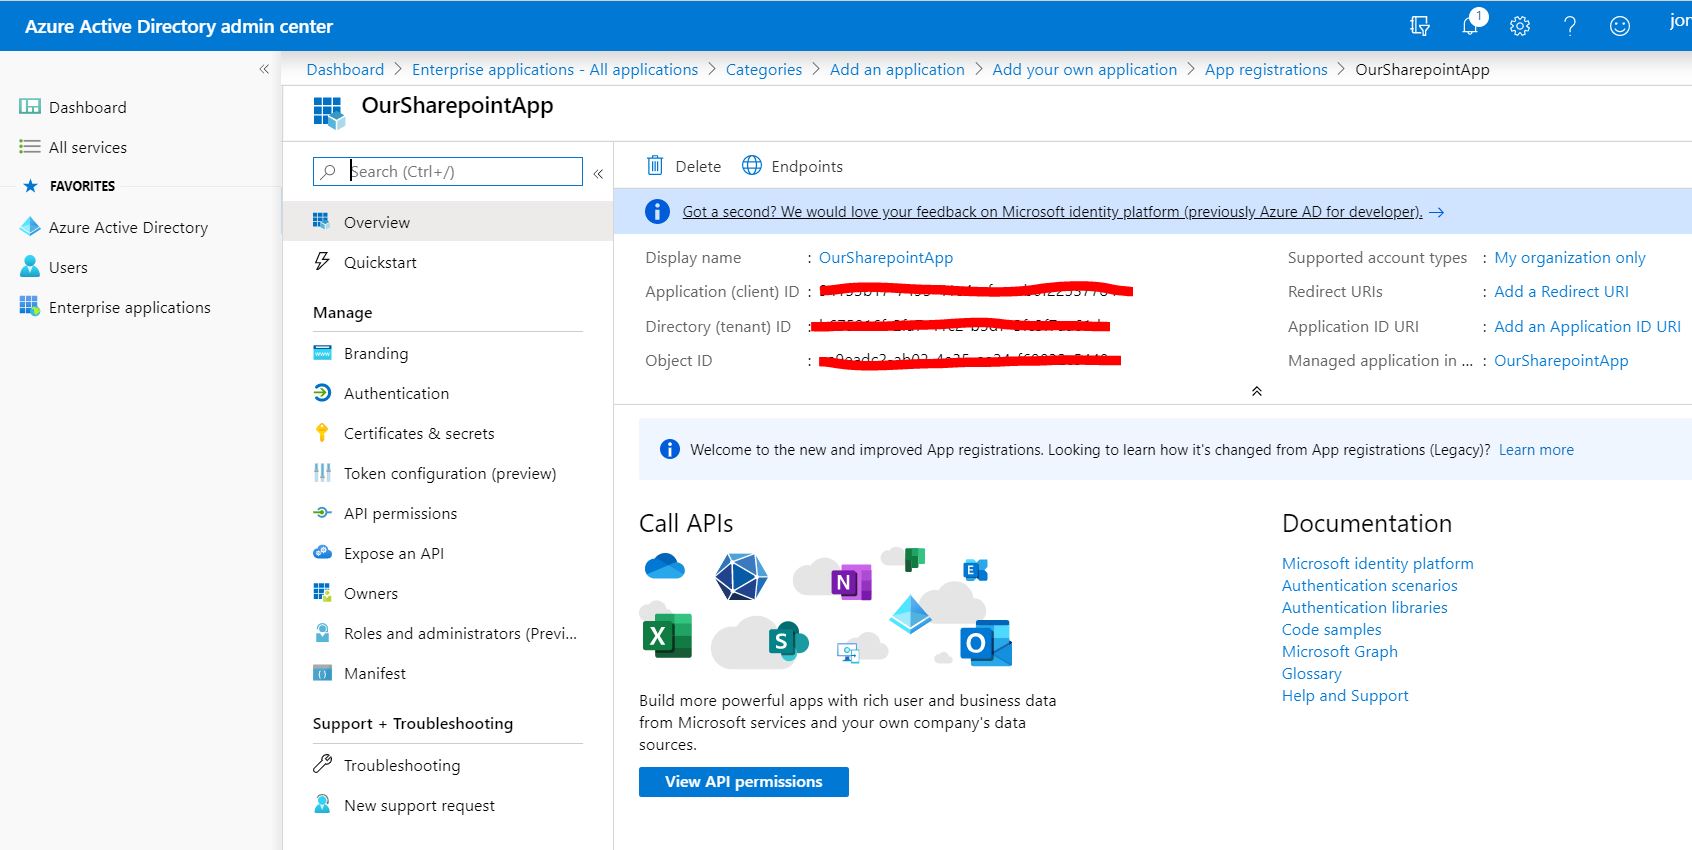
- Take a note of the ‘Application Id‘ (‘Client Id’) and ‘Directory Id’ (‘Tenant Id‘).
- In ‘Authentication‘, set ‘Treat application as a public client.‘ to ‘Yes‘ and click ‘Save’.
- Now go to ‘API Permissions‘.
- Click ‘Add a permission‘.
- Find and click the ‘SharePoint‘ tile.
- Give it all the ‘Delegated‘ ‘Read‘ permissions so you have: ‘AllSites.Read’, ‘TermStore.Read.All’, ‘User.Read.All’
- Then click the button ‘Grant admin consent for %username%‘.
The changes could take a few minutes to propagate. Don’t panic if it doesn’t work immediately.
Code
Sample
https://github.com/jonashendrickx/microsoft-graphsdk/
Prerequisites
You can get started by installing the required NuGet packages described at this page or below:
- Microsoft.Graph
- Microsoft.Graph.Auth
- Microsoft.Graph.Core
- (optional) System.Configuration.ConfigurationManager
Setting up Graph SDK
Follow all the instructions on this page to setup the Graph SDK. The required roles are mentioned next to the API calls. You will have to assign these roles as mentioned above and then also add them to the Graph SDK client. You can check the sample for more details on how to do this. If your roles or permissions don’t seem to be working immediately, it’s because they might take a few minutes to take effect.
The REST call ‘GET /sites/{siteId}/drive/items/{item-id}/content‘ would translate in C# as
await _client.Sites[siteId].Drives[docLibId].Items[driveItemId].Content.Request().GetAsync();Hopefully this is enough to get you guys started! Have fun!